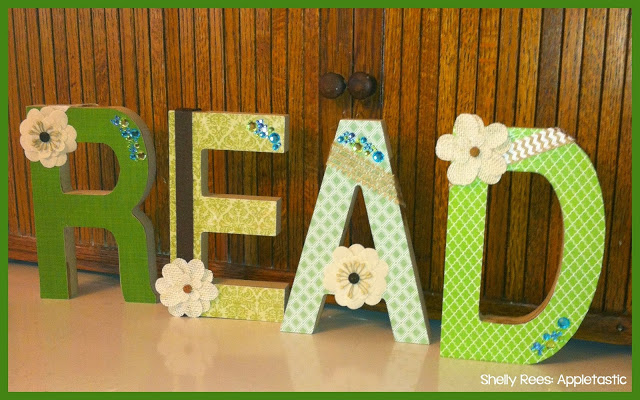
We’ve all seen them…. those unique wooden letters decorated so nicely they could be featured in a home-decor magazine. You can buy them online at small boutique shops, but you’d have to pay dearly. Why not make your own? These DIY Mod Podge Wooden Letters are a great way to personalize your classroom.
I wanted a nice set of these letters to spell R-E-A-D, so that I could hang them on the wall above my classroom library. I also wanted them to match my newest Chalkboard and Burlap Classroom Decor that I am planning on using next year (can’t wait!). So, I headed to the craft store (Michael’s was my choice), bought the necessary supplies, and began my little crafting session.
Here are the supplies you will need:
- wooden letters
- lightweight scrapbook paper (if you choose heavy paper, it will become wavy once you add the mod podge)
- Matte-finish Mod-Podge and Tacky Glue
- foam brush, scissors, pencil
- lightweight sandpaper
- coordinated embellishments
First, turn each letter upside-down and trace with pencil onto the backside of the paper. I chose to use a different design of paper for each letter.
Next, apply a light layer of Mod-Podge on the front of the wooden letter. Then, position the paper letter on top and press firmly into place. If there are any air bubbles or waves on the paper, gently rub until the paper is smooth.
Once your paper is in place, lightly sand the edges of the paper in a downward motion over the edge of the wooden letter. This will remove any excess paper on the edges and give the front-facing edge a smooth finish. Then, spread another thin layer of Mod-Podge on top of the paper. This helps give your project a nice finish.
The fun part is next! Using either Mod-Podge or Tacky Glue, add embellishments, such as ribbon, flowers, or gems into place. I used a combination of Mod-Podge and Tacky Glue for mine. The ribbon I chose was a burlap-style, so it was thicker and required the use of a heavier glue. Don’t you love these fun embellishments I found? They were perfect for the style!
Let your letters dry (I laid mine on their backs to help the ribbon on the backside stay in place) for about 30 minutes. Your oh-so-adorable, everyone-will-be-envious, where-did-you-buy-that letter display is now finished! See how crafty you are! 😉
If you create your own letters, I’d love to highlight your photos here! Happy Decorating! I hope you have fun making your DIY Mod Podge Wooden Letters for you classroom.
Here’s some more DIY classroom decor ideas:


