
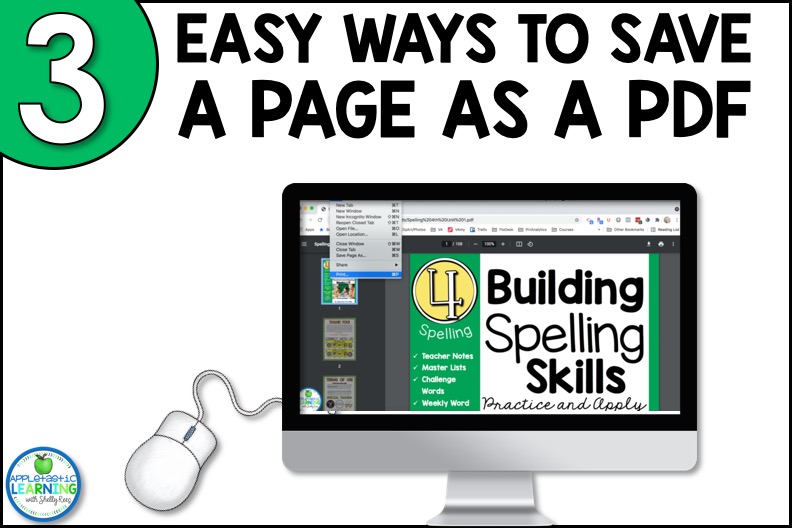
So many teachers have had to adjust their teaching practices lately. A lot of teachers have had to think creatively about how to get information to their students when they are learning from home. This means a lot of new digital skills were learned by both students AND teachers alike. Using technology more doesn’t mean you have to stop using what you know works. There are ways to use those printable PDFs that you already own in a digital or virtual setting. And NO . . . you don’t use your precious time recreating the entire PDF on the digital platform. Here are three ways you can easily save one page from a PDF in order to share them with your students.
If you are feeling worried that the process of saving one page from a PDF is going to be difficult or hard to do, have no fear. There are several different options out there to help you. They aren’t as complicated as you might think. Here are a few of the easiest and most teacher-friendly options for saving one page from a PDF document to share with your students. And . . . all of these work if you want to save more than one page too!
I know what you are thinking . . . Google Chrome is a web browser not a pdf reader. And you are exactly right. But Google Chrome also has many other features and this is one of them! In just a few steps you can pull out select pages from a pdf to share with your students.
Open a new Google Chrome window or tab. Then click Ctrl + O (Command + O on a Mac) to select and open your pdf file.
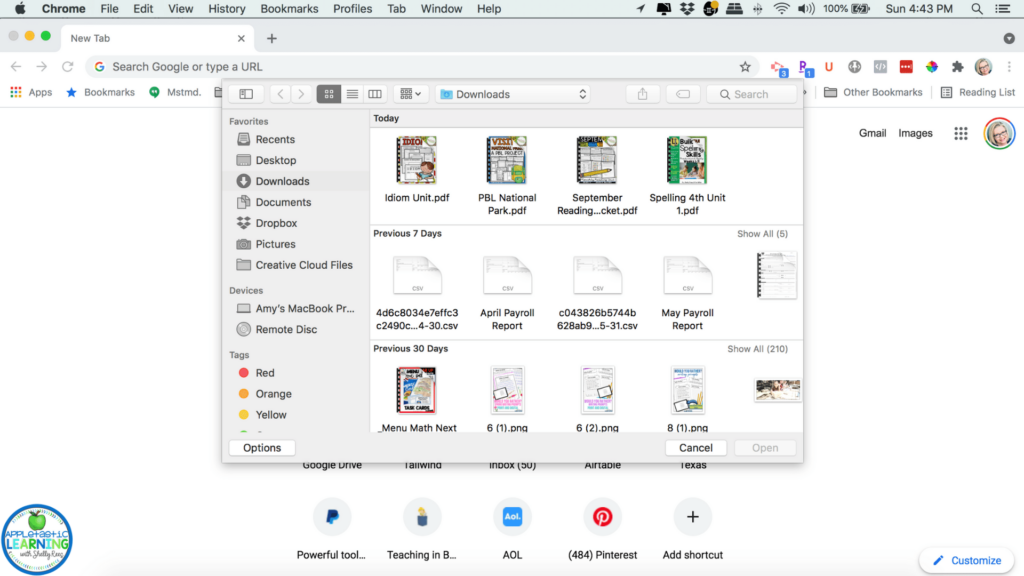
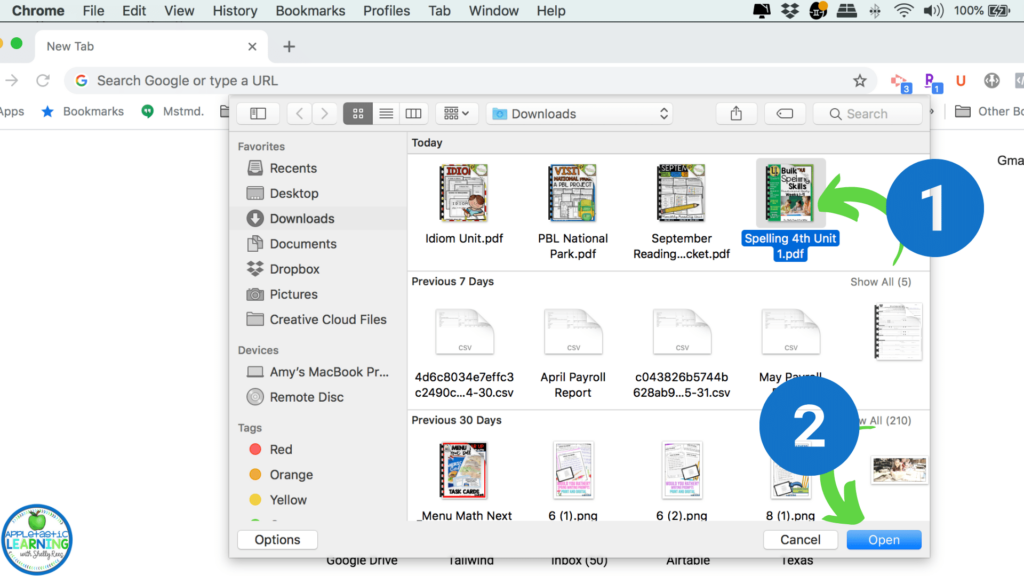
Just click on the file and choose Open in the bottom right corner.
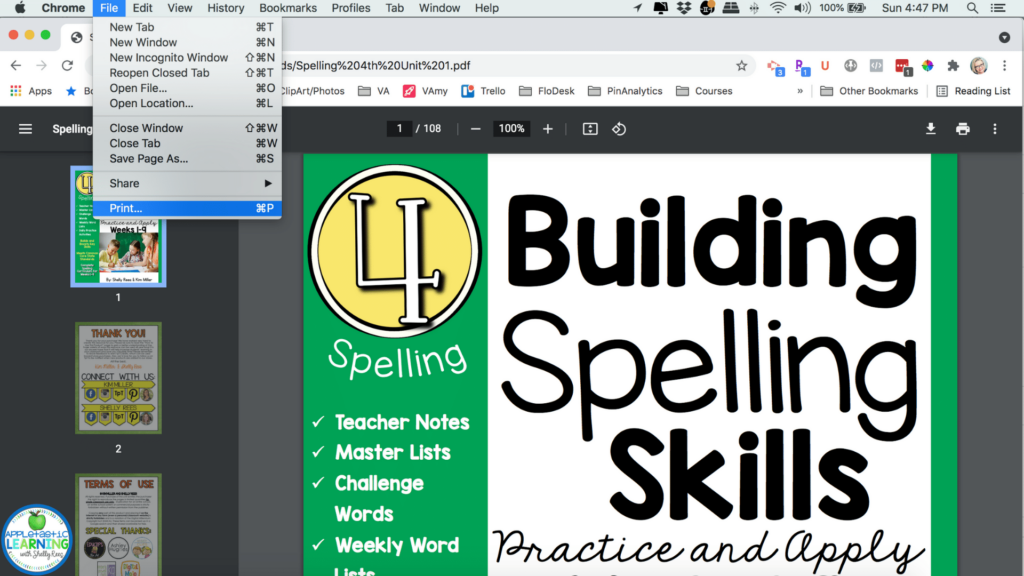
Your pdf will open in the Chrome window and look like this.
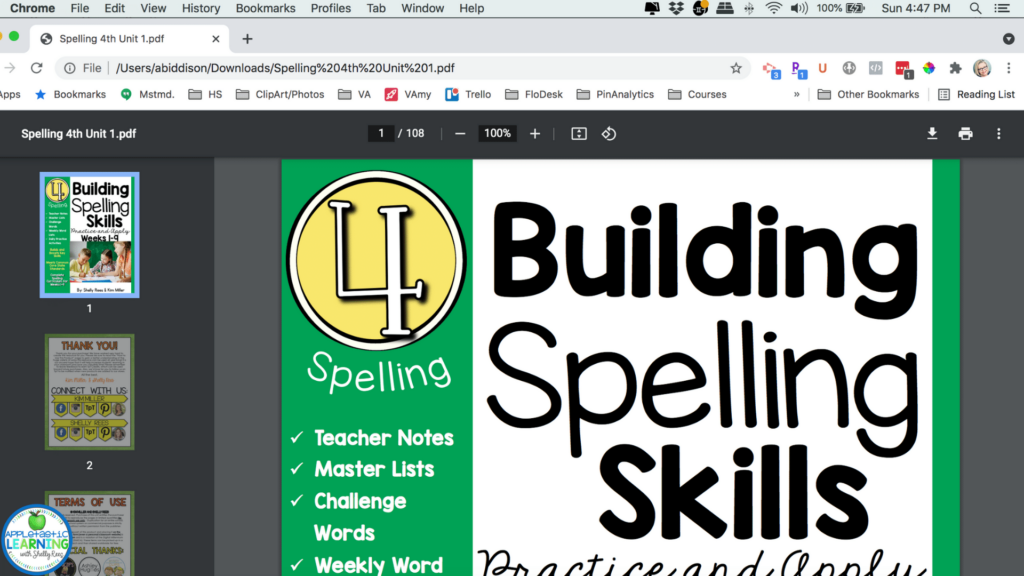
On the Chrome Navigation bar go to File and Print.
The print settings box will open.
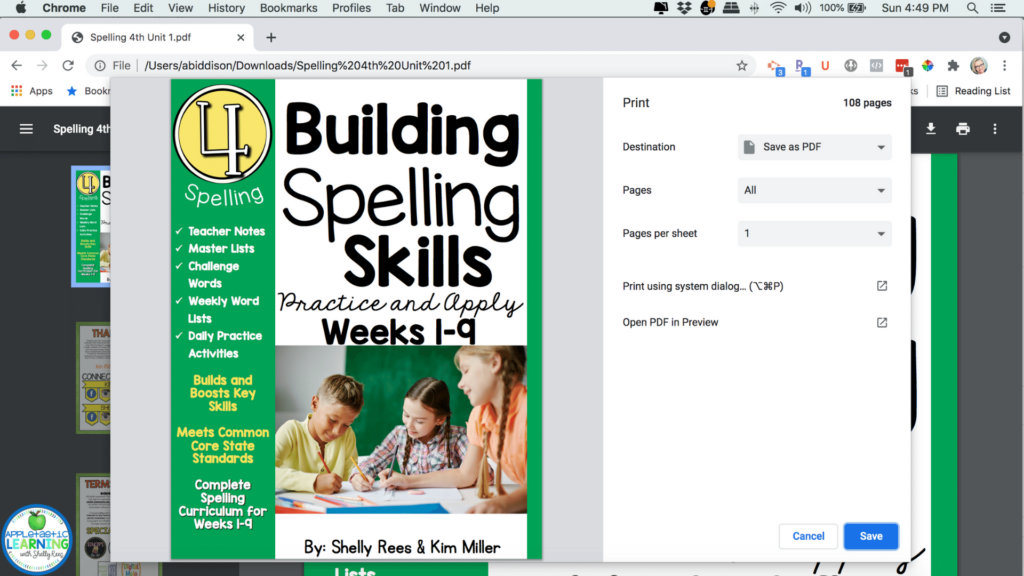
Click the dropdown arrow next to the word PAGES and select Custom.
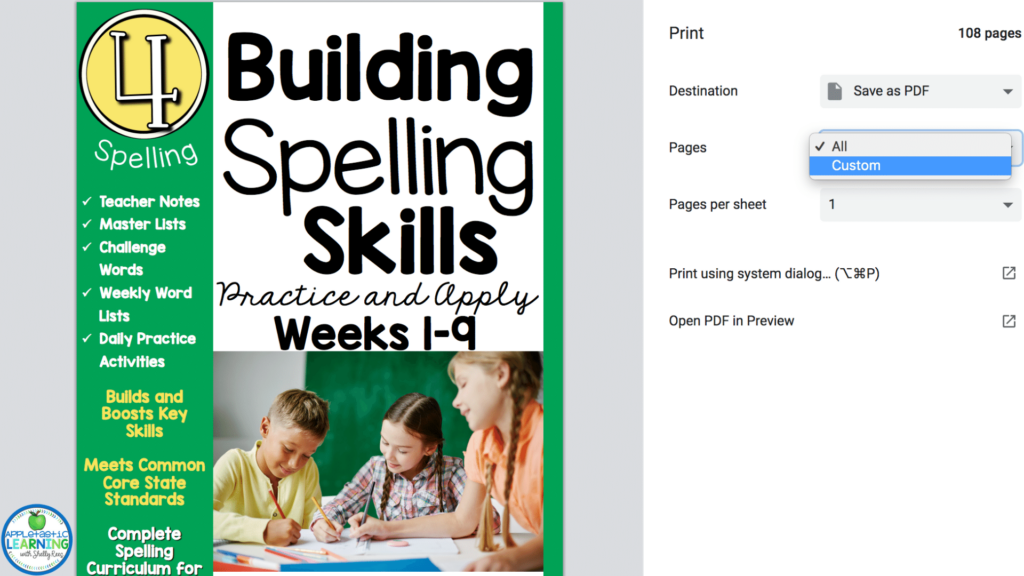
Then type in the page number or numbers you’d like to pull out. Don’t worry you aren’t actually going to print them.

Use the dropdown arrow next to the word DESTINATION and make sure to select Save as PDF. Once you have added the page numbers and selected Save as PDF then just just have to click on Save in the bottom right corner.

You will be prompted chose a location on your computer to save to. You can also change the name of the file if you wish. Then click Save one more time to save the file to your computer.
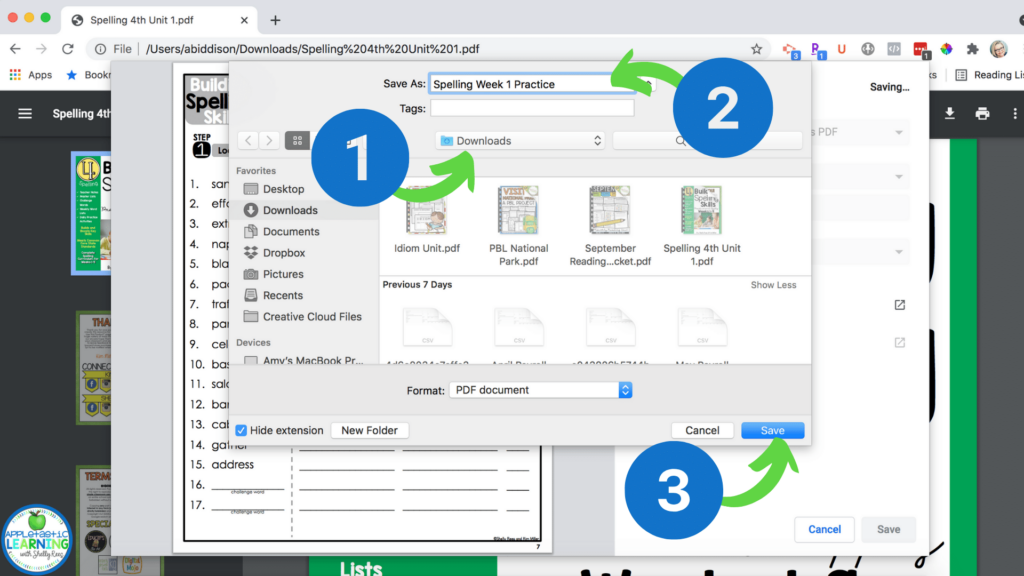
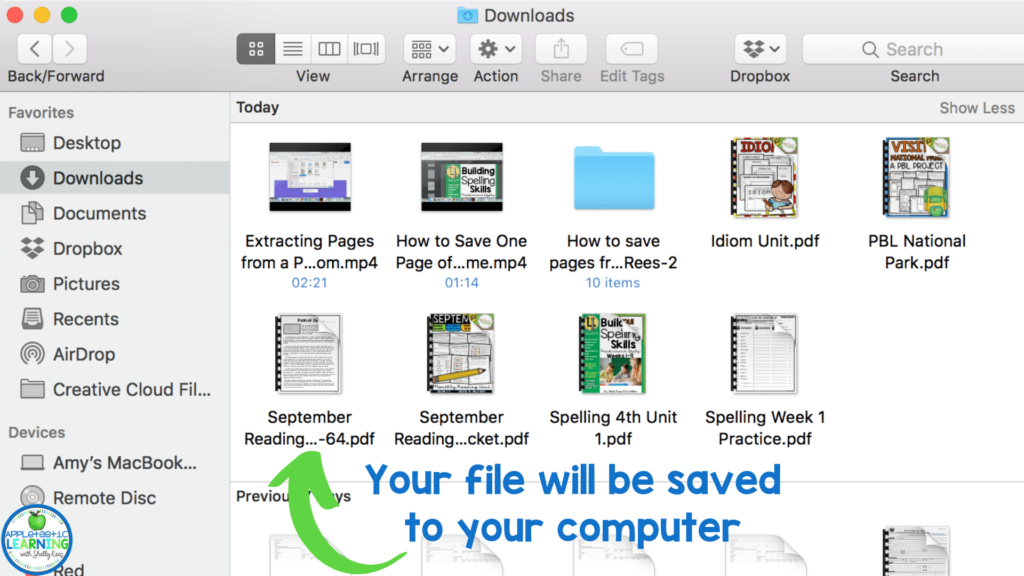
You will find the new file on your computer in the location you selected.
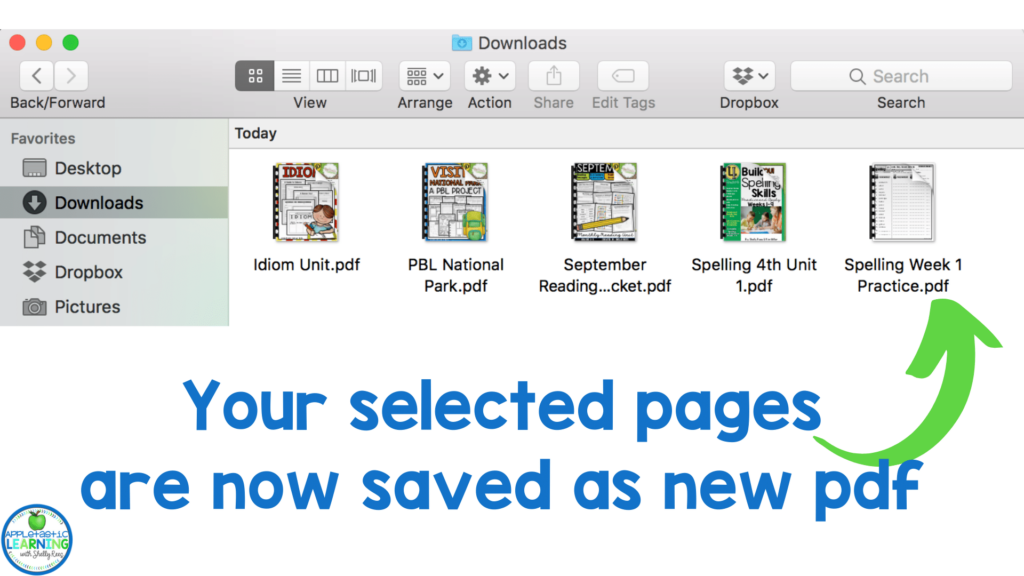
That’s it! Easy Peasy! In about one minute you can pull out your selected page(s) and have them ready to share with your students.
Here’s a quick video of all the steps in action!
Smallpdf.com is a website filled with tools you can use with pdf documents. For the task of pulling out one or more pages from a pdf you want to use the Split PDF Tool. The one thing you need to know is that this a free website so there are lots of ads on the page. Just follow these instructions to avoid clicking on the ads and extract the pages you need from your pdf.
First you will want to upload your pdf file to the SmallPDF tool by dragging it in the purple box or selecting Choose File inside the purple box.
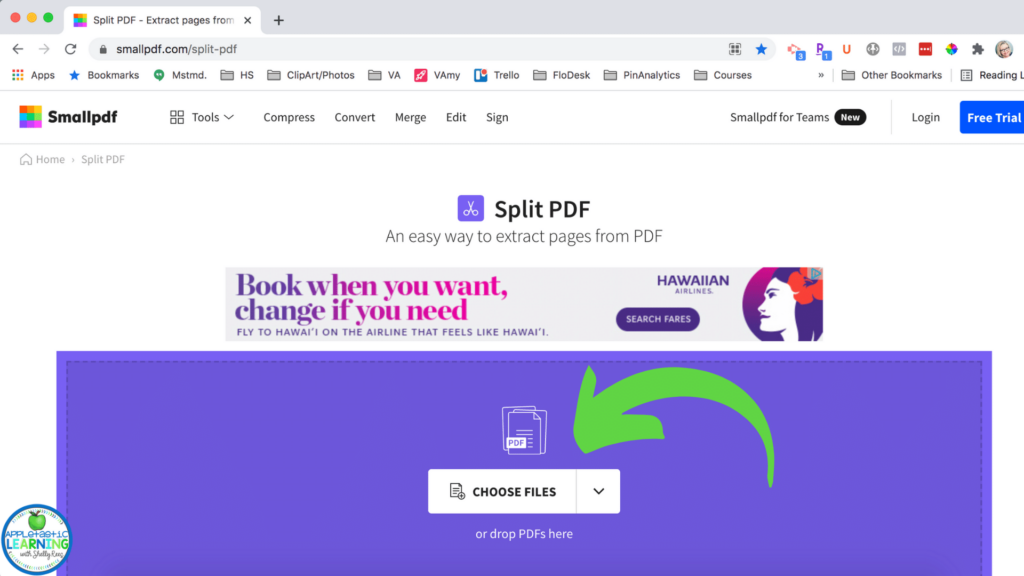
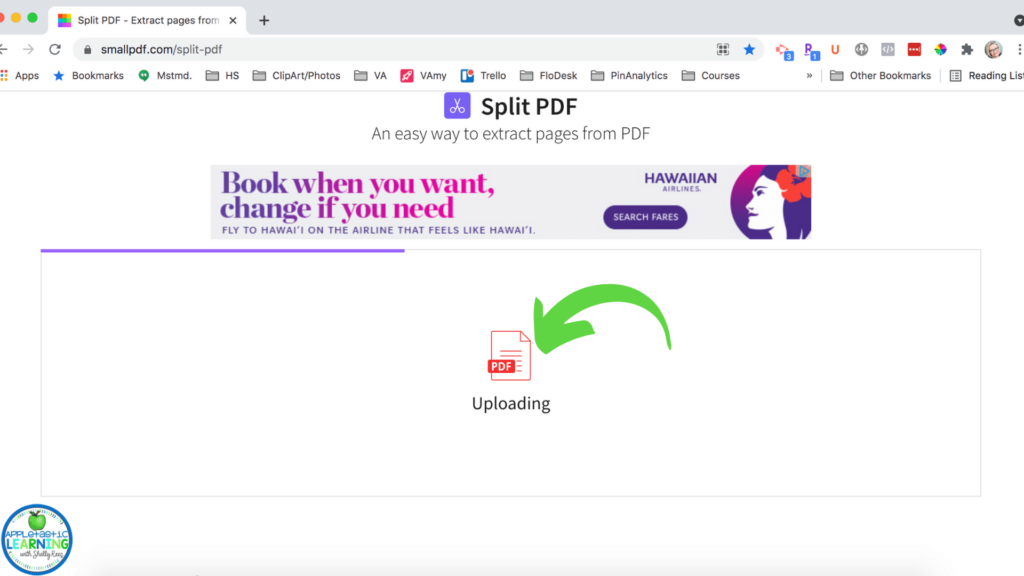
The file will begin uploading and you will see the notification that this is happening. It may take a minute or two depending on the size of your file.
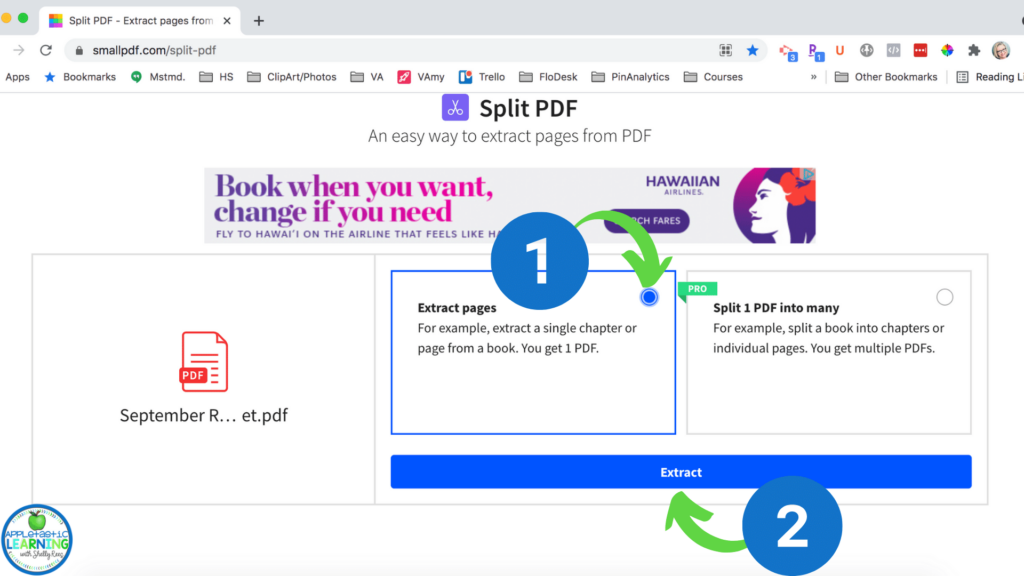
Once the file is uploaded, you want to select Extract Pages (One PDF) from the options provided. This is the free option and will allow you to do everything you need. Then click on EXTRACT button.
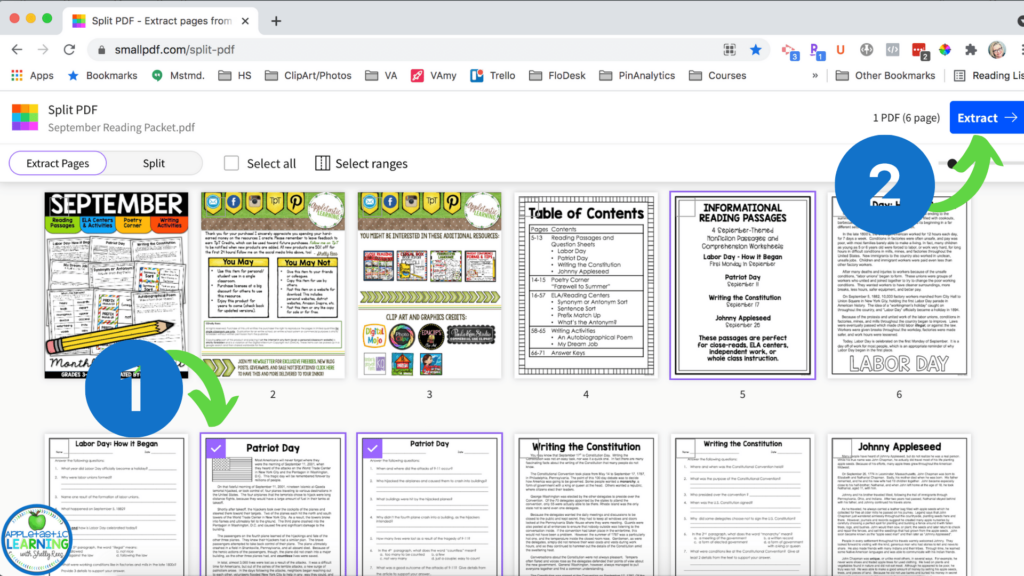
You will then go to a screen where you can see each page inside of your pdf. Scroll through the pdf and select the pages you want to extract by putting a check mark in the box in the upper left corner of the page. Once you have selected all the pages you need, click EXTRACT in the upper right corner.
You will then be taken to a page where you will see only your extracted pages. Scroll through them to make sure you have what you need, then click Download on the right side.
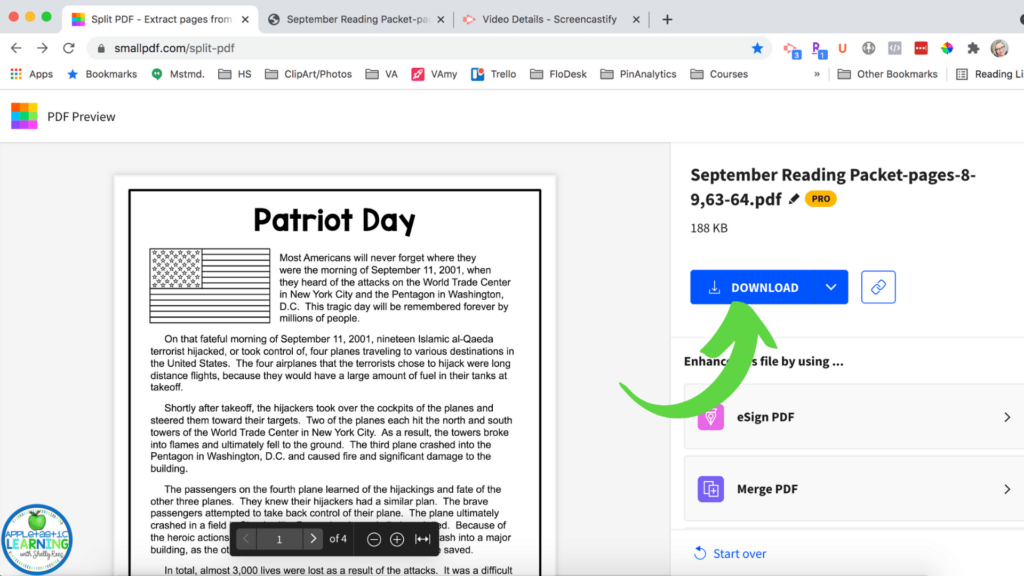
The file will automatically download to your computer. You now have the extracted pages in their own pdf to share with your students.
Here’s a quick video of these steps in action. Please note that for the sake of time, I had various tabs open at different stages of this process. This was only to save time and is not something you need to do.
Taking a screenshot is the simplest way possible to get a page from your PDF into your digital platform. While it isn’t editable, there are extensions for Google Slides that will make your slides interactive for your students.
Open the PDF and scroll to the page you want to use in your digital program.
Take a screenshot of the PDF page you want to use. You can quickly do this on a PC by pressing Print Screen or using the Snipping Tool. On a Mac you can get the Print Screen feature by pressing Command+Shift+3 or select your area using Command+Shift+4.
The screenshot will be saved to your computer as an image. You can then add it to you digital activity or attach it to an email in order to share with your students.
I hope that these three tips will help you to better utilize the pdf teaching resources you have. While there are many great digital activities available you don’t have to throw out the old just to teach with the new. These different options will allow you to quickly and easily pull out pages from a pdf resource to share with your students. Did you know that you can also print a PDF as a poster? Check out this blog post, How to Print a Poster from a PDF, to find out just what to do!
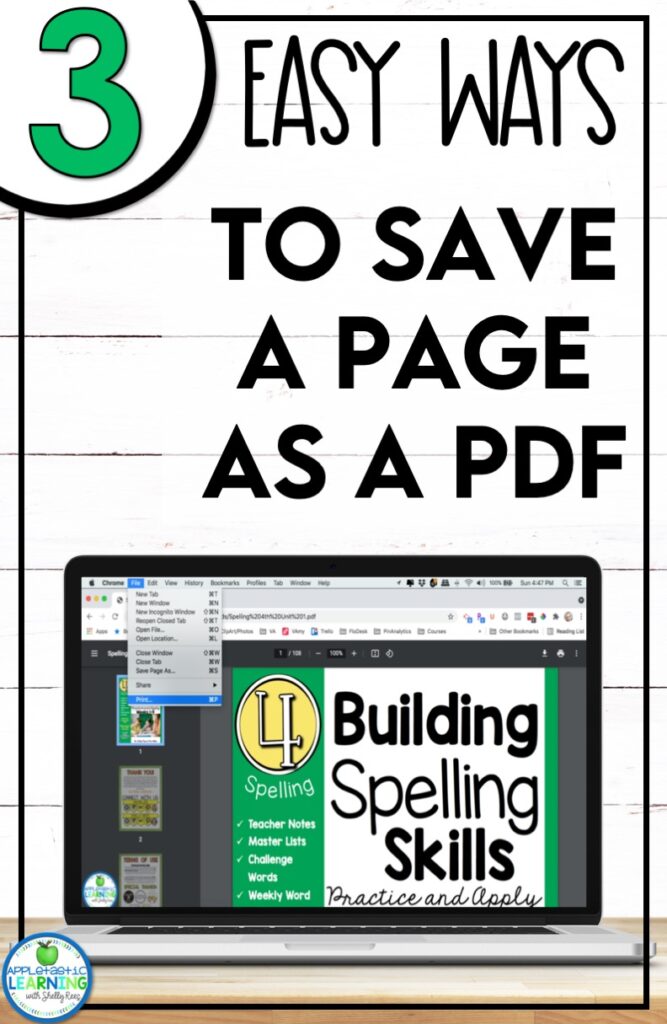
Don’t spend your valuable teacher time searching for ways to extract pages from a PDF. Instead just pin this to your favorite classroom Pinterest board so you can quickly come back when you need a reminder.

Hi, I’m Shelly! Thank you for being here. I love helping third, fourth, and fifth grade teachers with fun and engaging activities that require no to little prep! Let me help you by taking some of the stress and work off your plate.

©2022 Shelly Rees. All Rights Reserved.